My photo
Hello! Welcome to my simple food blog. As the name implies, this blog is solely served as my repository on food. Desserts, home-made cooking, reviews both raves and rants, recipes, or whatever that I encounter :). Hope you enjoy your stay :) and if you feel like it or tried the recipe, do comment on it. Comments are loved ;).

Sunday, February 26, 2012

The Lazy Apple Blueberries Crumble also Got an Upgrade

Yeah! The lazy apple blueberries crumble (click here for fast reference) finally has an upgrade. Just a simple addition of Macadamia nuts, and the taste goes up to another notch, now, that's what you call an upgrade LOL...


How much macadamia to add? Just add about 50 gr will do the job.
Also, a quick note, if you're using bigger ramekin, do add about 10-15 minutes more than the usual recipe because it takes longer for the apples to cook.

Enjoy!

The Curry Rice Got an Upgrade

I'm experimenting with a different type of curry rice, you know, those that you usually seen in the restaurant. Is it difficult to make? Nope, and it's healthier than the usual curry rice because now we have some colorful veggies :).

Yield: 2 person

What you need:
Curry Sauce:
1/2 pack Curry block. This time I use Glico brand 'LEE'. It's supposedly 10 times spicier, yeah right, still OK, not spicy at all, but definitely taste stronger than House's Vermont Curry
450 ml chicken stock (the recipe on the packet will ask you to add in 350 ml water but I find that it's too thick)
1 onion, sliced big
2 carrots, cut big
2 potatoes, cut big
1 apple, puree
Stir fry:
1 tbsp dried chili (yeah, I like this stuff)
1 orange pepper, charred and filmed, sliced big
2-3 Japanese eggplants, sliced by length
1/2 pack nameko mushroom
50 gr brussel sprouts, halved
150 gr shabu shabu meat
Seasoning: mirin, salt, pepper

How to:
Sauce:
1. On a sauce pan, saute onion until soft, then add on carrots and potatoes.
2. Add on chicken stock and bring to boil. Once boil, add on apple puree and curry block.
3. Boil until carrots and potatoes are soft.
Stir fry:
1. On a wok, saute dried chili until fragrant then add all veggies except orange pepper. Add on mirin accordingly as eggplants require lots of liquid to get soft. Close the wok with a lid for 5 minutes.
2. Once Eggplants are soft, add on orange pepper, keep on stir frying.
3. Add on shabu shabu meat, and cook until it's done.
Assemble:
1. On a plate, add rice on the half of the plate, and curry sauce on the other half. Then add the stir fried veggie and meat in the middle.

Enjoy! 


Thursday, February 23, 2012

Chicken Ball Porridge

It's been a very long time since the last time I made this chicken porridge and I usually only make this when I'm sick or my tummy is not up for the regular food intake. And, having the wonderful Zojirushi (elephant brand) rice cooker aka rice cooker which can cook not only rice but also porridge, mixed rice and even steam and make cakes makes it even easier to cook this dish. I don't need to control the fire or worry that the porridge will burn on the bottom of my pan if I don't stir it. So, just how easy to make this porridge?


What you need:
1 cup of rice
400 ml chicken stock
Water - as you need
Ginseng - as you need
Chicken balls:
250 gr minced chicken
15 gr corn flour
seasoning: pepper and salt

How to:
1. Cook rice the same way as you usually do, just add the chicken stock first then top up with water to get to the porridge measurement in your rice cooker bowl (this is why I like my rice cooker, no brain needed). Set it to porridge and cook.
2. In a bowl, mix all the chicken bowl ingredients until well mixed.
3. After about 15 minutes cooking, open the rice cooker lid and with 2 spoons, start making chicken balls and put them in. Then add ginseng.

Tips:
- You can use 100% chicken broth instead of mix it with water. I use canned chicken stock so I have to add water to dilute the sodium content in it
- You can sub the minced chicken with minced pork or mix pork and chicken 50-50
- You can add green onion as topping, it'll make a great presentation
- For side dish, you can make sweet soya sauce scrambled egg (my fave), or add some pickled radish or even the pickled tofu (I used to like this, but guess not anymore now)

Kaastengel

The sinful cheesy delight for happy indulgence when you watch TV or work in front of your lappie or just when you feel like it :) Now it comes with new look too, Thyme is your friend now ;)...

The always beloved original Kaastengel


And its new friend, the round Thyme Kaastengel


Yummy and delightful, yeah!!!

Monday, February 13, 2012

Back to Basic with Stir Fry

We're going back to the basic. What is stir fry? If you google it, you'll see gazillions recipes floating around across the dear Internet. It even has its own article in Wikipedia. Set aside of what Wikipedia said, my own definition of stir fry is throw whatever you like into a wok add some cooking wine, stirring it until it's nicely cooked, done. The 'whatever you like' can be the combination of veggies, meat, or even fish. This time I make the super easy one because it's been a very long time since the last time I ate chayote aka labu (again you can see here Wikipedia -- what a very useful website LOL). Surprisingly, aside from Indo, it's not so easy to find this labu around. It's already not so easy to find in Singapore's supermarket as it's not your everyday veggie (and not cheap as well!!), let alone in country like the US (you need to go to Asian supermarket and get the WTF moment when you see the price... I had that one moment before when I was in US). 


This dish is simple, effortless to make and easy to your tummy, and definitely yummy.


What you need:
1 no Chayote, sliced square
200 gr shabu shabu pork meat
1/2 no onion, thinly sliced
3 cloves garlic, chopped
Seasoning: mirin, salt paper


How to:
1. On the wok (I use a very small one), saute garlic and onion until soft
2. Add on meat, saute until half cooked, then add chayote
3. Add on splash on mirin to prevent your bottom of the wok from burnt, then stir fry it. If your wok has a lit, close it, it'll cook faster and as your mom will say, close the lid so that the nutrients don't evaporate to the air. 4. Add salt and pepper and you're done once your chayote is soft (just nice because your meat won't be overcooked).

Saturday, February 11, 2012

Marbled Cheesecake

This is the first time I made a square cheesecake. Marbled cheesecake is one of the easiest cheesecake to make. You only need a very small quantity of chocolate and it looks pretty. I mixed Oreo and digestive biscuit for the base because I'd like to experiment with new base texture. Sometimes I find pure Oreo can be quite oily. The real reason? I just don't have enough Oreo for the base :p.


And having square cheesecake make it looks nice for presentation because you can just cut it square, not the pie chart graph pieces. Come to think of it, from this pic, the squares look like marbled brownies upside down, don't you think?

Kakiage Donburi ... My Version


It's been a very long time since I did deep fry dish in my kitchen. So, I forgot a lesson or two on the art of deep-frying while making this kakiage donburi and ended up with quite a hefty casualty. Normally Kakiage is done with shrimps/prawns,squids and scallops (at least that's what MOS burger version has). Some restaurants will also use perilla leaves (I love those leaves but damn they're expensive). To me, I conclude that Kakiage is Japanese version of bala bala, OK slightly different, but the idea is the same. Basically you put together a of sliced veggies plus some seafood of your liking, mix it into a batter and deep fry it. That's why initially I'm thinking of making bala bala instead of kakiage. But there's a catch. In bala bala, the art is to make the batter not too watery and to stay fluffy after hours. We don't have to do that for Kakiage because guess what, you just need to follow tempura mix recipe on the back of the package, which is exactly what I did.

yield: 1-2 person (depends how big you want to make your kakiage)

What you need:
100 gr silver fish
50 gr carrot, julienned
1/2 no onion, thinly sliced
1 pack enoki
100 gr tempura flour
160 gr water

Sauce:
7 tbsp soy sauce
4 tbsp mirin
1 tbsp Worchestire sauce
1 tbsp honey
5 tbsp water

How to:
1. On a bowl, make the tempura batter, and add on the rest of ingredients, mix well
2. On a wok, heat up oil to 170-180C (How do you know? Just do a random test, splash bits of tempura batter, if it come up fast, then it's ready for frying)
3. Deep fry the portion
4. Sauce: on sauce pan, mix all the ingredients and heat them up.
5. Assemble: On your bowl, place rice, pour in bit of sauce (not too much, but to your liking). Place the kakiage on the top, and drizzle it with the sauce again.


Tips:
1. If you're too lazy to heat up the sauce, don't add water to it. Just mix the rest of ingredients on a bowl and use it.
2. My crash course refreshment on the art of deep frying:
    - Don't be stingy with your oil and use a big wok because deep frying is not the same as pan frying, the oil will rise up when you put in the kakiage. If you use small pan, you'll have lots of oil to clean up afterwards
    - Keep your tempura batter cold. Cold batter will make your stuff crispier
    - Pay attention to the oil temperature. If the oil not hot enough, you'll end up with a soggy kakiage (which is my first batch). Bala bala still can take lower temperature because of the way its batter is made, but not kakiage.

Monday, February 6, 2012

Buta Miso ~ Pork Miso

Now I know why Japanese are very proud of their miso and why miso have different prices. You don't need any thing else if your miso is good enough and your dish will taste just nice. This dish is very easy to do and you can vary it with other stuff too.


What you need:
1/2 no onion, thinly sliced
30 gr chives, cut 4cm length
100 gr pork shabu shabu meat
1 tbsp miso
2 tbsp mirin

How to:
1. On the pan, saute onion until cooked and fragrant
2. Add in miso and mirin, mix until miso is well dispersed but still retain the color
3. Add in meat, if you feel that you need to add some water, do add on mirin instead
4. Once the meat is half cooked, add in chives, mix in until it's all cooked

Tips:
- If you feel that the miso taste is too strong for you, you can add some water, but the color will change to what you often see in miso soup, like below. For this version, I only use chives, pork, miso and mirin. I didn't even use oil. I like the top better than this one, but you can give it a try if you feel like having a milder version.


Enjoy!

Sunday, February 5, 2012

Yakisoba Made Easy


I absolutely love having frozen shabu shabu meat in my freezer and this is one of the reason why. It's so easy to make any dish, especially when you're in a rush or just plain hungry. I used fresh yakisoba noodles instead of the instant one because initially I bought this to cook ankake cripy noodles (it looks so good on the show that I watched) but alas, I cringe at how much it'll cost me to whip up one just for myself. So, that 1 packet of noodle has been sitting in my fridge for quite some time. Off course using the fresh noodles will make the dish taste better because fresh noodle is thicker and more chewy, but if you happen to have just the instant noodle, that will do as well.

yield: 1 person

So what you need:
1 pack of fresh yakisoba noodles (usually they already include the sauce seasoning inside, so it's easy)
1/2 no onion, thinly sliced
100 gr shabu shabu meat (usually it's about 6-7slices)
30 gr leek, thinly sliced (to make it look pretty)
Seasoning: mirin

How to:
1. On frying pan, saute onion until cooked and fragrant.
2. Add on shabu shabu meat (still frozen) and splash some mirin to melt and cook it.
3. When the meat is half cooked, add on leek and noodle, and yakisoba seasoning and you're done.
    * when you use fresh yakisoba noodles, as often the noodles stick together so you'd need to break them up by adding bit water and using chopstick wiggle them bit by bit until all noodles are loosed.

Bistik ~ Indonesian styled Steak

When we're talking about Indonesian home cooked dishes, apart from local dishes, most of Indonesian that I know will know bistik. It's originally a Dutch dish (it must be, the word itself gives the implication). From generation to generation, the recipe varies and each household will definitely carry different recipe. But, essentially, the taste shouldn't be too far off between recipes. The dish itself is usually comprised of sliced marinated slices of meat, then either deep fried or pan fried and served with fried potato wedges and boiled carrots and green beans.

Most bistik is made from beef, but there are some made from pork as well. The difference? It's in the sauce. Beef bistik has stronger and sharper flavor compared to its pork counterpart. What I like? Pork bistik using beef bistik sauce because the thing about beef is that it's harder to cook and you often end up with over-cooked and tough beef. When I went to Sumber Hidangan in Bandung, they serve their bistik a bit differently. They're using beef and pork patties instead of the slice meat,which is I find it interesting because it looks like Japanese Hamburger Steak (pic below):


It gives me an idea, what if I use what I usually make for my Hamburger Steak but instead of the troublesome to make demiglace sauce (unless you're using canned ones), I just use bistik sauce instead, shouldn't be difficult right? Yep, it's super easy.


*yield about 5 person


What you need:

1 pack Hamburger Helper (the Japanese one, NOT the Western one)
300 gr Pork (best is 50-50 of beef and pork --> the pack will indicate to use 250gr, but it's OK to add more)
1 no Onion (half thinly sliced for sauce and half finely chopped)
200 gr carrots, cut 4cm block
200 gr green beans, cut 4cm long
5 no potatoes, cut wedges
Sauce seasonings: butter, sweet soya sauce, Worchestire sauce, sugar, pepper

How to:


1.     Steam carrot and green beans and set aside. You can also microwave them, cling wrap the tuppleware and poke some holes on it and micro for 1-2 minutes for green beans and 3-4 minutes for carrots. Alternatively, you can boil them as well (I don't really fancy boiling veggies because you tend to loose the nutrients).
2.     Deep fry the potato wedges and set aside.
3.     Follow Hamburger Helper recipe (My version below may not be the exact translation on what's in the pack)
1.     In a bowl, soak the Hamburger Helper with 120ml (1/2 cup) water for about 5 minutes.
2.     Add on meat and onion in this case, and mix them until firm and well mixed (should take about 4-5 minutes) and make patties. It should results in 5 patties weighing about 100gr each.
3.     Pan fried those patties until well done.
4.     Sauce: After cooking the patties, in the same pan, add on butter. Saute the sliced onion until cooked and fragrant. Add on all the sauce seasonings to your taste. After you get the taste that you like, bring the sauce to boil and you're done.
5.     Assemble: On a plate, with the patty in the middle, line up your veggies and pour in the sauce.


* I don't use potatoes for my picture because I eat my bistik with rice :D.


Tips:

Storage: You can freeze your cut carrots and greenbeans and steam them as you need them. You can also freeze your hamburger patties as well and pan-fry them when you like the have them.
If you don't have Hamburger Helper, you can make your own Hamburger Helper by mixing:
  1. Breadcrumbs (the softer type, not the panko type) (about 50-70 gr)
  2. Seasoning: salt, sugar, paper and herbs (if you like --> it can be dried or freshly chopped herbs)
  3. Chopped onion
    Enjoy!

    Stirred Fry Cassava Leaves with Anchovies


    I love Cassava leaves. It has rough texture and good for your digestion. Alas, it's not that easy to find if you don't live in Indonesia. From my last trip back home, I manage to bring back 400gr (that's quite a lot, but leaves shrink when they're cooked) of Cassava leaves and I still currently have some in my freezer (yes, I froze them so that they can last for a very long time until I have the mood to have them again). 

    There are not much variety of dishes that you can whip out of these leaves. Typical dishes that I know are (pics are in order): 

    1. Pecel (boiled and mixed with peanut sauce and other boiled veggies)

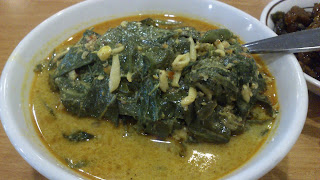
    2. Tumis (stir-fry with coconut milk gravy, the one below has silver fish added in)


    3. Urap (boiled and mixed with finely shredded seasoned coconut mix and sometimes also mixed with other veggies). This is my ultimate cassava leaves favorite but the most troublesome to make and sadly I didn't manage to eat this during my last trip so no pics, but if you google urap, you'll get the idea.

    So, as you can see, most of the dishes involves either peanut sauce or coconut. I'm OK with shredded coconut (so long it's not sweet) but I'm not super fancy of the coconut milk, so what should I do?


    Well, you just need to make it slightly bit more Chinese style LOL. It still has the cassava leaves texture and definitely healthier with 0 coconut milk, and most definitely easier to do as well.

    What you need are:
    100 gr Cassava leaves
    50 gr Anchovies
    5 cloves garlic (like pasta, to me, the more garlic, the merrier)
    1 red chili - thinly sliced (if you don't like spicy, you can seed them)
    Seasoning: salt and pepper

    How to:
    1. I don't like salty anchovies. So it's to your preference. You can skip this step if you'd like to. Boil anchovies for about 5-7 minutes. Strain them.
    2. Using the same pot, boil cassava leaves for 1-2 minutes. Strain and pour cold water in or you can use ice bath (blanche). Once cold, squeeze out the water or pad dry with towel paper and cut to 2cm length or to your liking.
    3. On the wok, saute garlic and red chili until fragrant and add on anchovies and the Cassava leaves.
    4. Add salt and pepper if you still feel it tastes bland.

    Tips:
    1. How do you freeze the cassava leaves? It's easy. You just need to make sure it's clean and dry. I portion the leaves into 100gr batches put in the plastic bags (clean ones) and freeze them. It's almost the same technique on how you'd store your herbs.

    Enjoy!

    Saturday, February 4, 2012

    Shirasu Pasta


    Another result of watching too much variety shows, here is Shirasu pasta. This is a very simple pasta with simple taste, and a no brainer to do. I find it quite foolproof, so very small chances of screwing up this dish.

    *for 1 person

    Ingredients:
    100 gr pasta - boiled until al dente - put in 2 pinch of salt in the water (the part that Aiba-chan forgot to do in his :p)
    1/2 red chili - sliced thinly and seeds removed
    3 cloves garlic - chopped coarsely
    35 gr shirasu
    2 tbsp olive oil for stir fry

    How to:
    1. in the frying pan, add in oil, garlic and chili and saute until fragrant (don't let the garlic burned)
    2. add in Shirasu, stir fry for about 1 minute
    3. add in pasta, stir the pasta until the shirasu is well mixed

    Tips:
    1. add sunny side up egg, it'll taste better (there's no egg in the pic because I had too much eggs lately :()
    2. if your budget is accommodating, add more Shirasu, the the more the merrier
    3. Shirasu by itself is already salty, so don't add too much salt when you cook the pasta. I roughly only add about 2 small pinch of salt and it tastes just nice, not overwhelmingly salty

    Nabe ~ The Lazy Version ~


    I watched too many variety shows that has nabe/shabu2 or basically anything with a pot, and tons of stuff inside that pot and it looks mouth watering. From one of the interviews that I watched (viva fansub), 1 person can have sooo many of types of nabe pots and he's a damn busy person, so it shouldn't be THAT hard to cook, right? And, yeah, it's not hard, and basically you just need to put in what you like there. And, NO, having chinese cabbage/sawi/white cabbage whatever is NOT my idea of shabu2/nabe because it's cheating and I hate restaurants who try to cheat you by having lots of cabbage and only tiny 5 slice of meat on the top. My version also have about 5 slice too but underneath those meat is definitely not the damn cabbage, and it still didn't cost me a bomb to make.

    This recipe is just nice for a 1 person nabe pot like what I had in the pic.

    Ingredients:
    1/2 cup bonito stock -- this is the 1 time suffering but you'll enjoy many times of goodness
    1/2 cup chicken stock -- I use organic chicken stock, no way I'm gonna boil the chicken bones to make my own stock
    1/2 cup water -- no need to use all
    1/4 part leek (the big one) -- julliened
    1/2 part carrot (another big carrot) -- julliened
    1/3 part of shabu2 meat packet -- usually 1 pack will have about 20 slices, so make your own ration, I conclude 1 packet = 3 times of goodness
    1/2 pack tofu -- sliced
    1 pack enoki mushroom -- cut the root

    How to:
    1. On the nabe pot, place leek, carrot, and enoki, then tofu and meat. If your stocks are in ice cube form aka frozen, place them on the bottom. Then pour in all the stock first then water until you can see the liquid in between the tofu.
    2. Close the lid and bring to boil in very very small fire. It should be done w/in 10-15 min and the meat will be nicely cooked too.

    The suffering part --> bonito stock
    1 pack bonito --> follow the instruction on how to make bonito stock behind the packet. Usually 1 big pack of bonito can make 2L of very very nice stock and another 1L of a not so fragrant stock but stil can do. Use ice cube tray to freeze your stock for nice rationing (Daisho have tons of different sizes and I think they have pink ones too). You can add konbu too but I find that konbu is bloody expensive.

    Tips:
    1. Use chives if they're available instead of leek. Most of nabe that I saw (including the one that I had in Fukuoka) have chives. Leek is probably more for shabu2, but anything goes in my kitchen :p, whatever makes me happy.
    2. Do add some red chillies (can be dry or fresh), it'll add a zesh and color on your nabe.
    3. Don't use green onions because they're slimmy and you can't really julliene them
    4. If you're too lazy to julliene, slice carrots very very thinly but it doesn't look so nice :p
    5. Do add raw egg just after you open the lid, let the egg yolk raw. This way, you can have 2 flavor of your nabe in 1 bowl. The first one if your original flavor, then you poke the egg yolk and mix into the soup and you'll get another different flavor. Egg yolk makes your nabe creamy, which is yum...


    Apple Blueberry Crumble ~ The Lazy Way ~


    I modified some of the recipes that I have on crumbles and the result is the crumble that I can eat. It's not sweet (you can jolly well add ice cream/choco sauce/whipped cream and all other sinful stuff, and you'll feel less guilty), and it's nice on your tummy, best to eat it hot.

    Ingredients:
    Crumble:
    1/2 cup plain flour
    1/2 cup oatmeal
    4 tbsp brown sugar
    30 gr butter
    Filling:
    3 apples - peeled, cored and sliced 7mm thick
    40 gr blueberries
    5 tbsp Grand Manier

    How to:
    1. In a bowl, add on all crumble ingredients, rub the butter until the dough look like bread crumbs, set aside
    2. In another bowl, add on the filling ingredients plus 2 tbsp of the crumble dough from Step 1. Mix the fruits until nicely coated
    3. Place the filling on the ramekin and top it up with the crumble. The recipe fits for one 8" ramekin, OR two 4" ramekins OR four 2"plus ramekin.
    4. Bake in the oven at 200C for the first 15 min, then you'll see the trumble browned. Cover with aluminum foil and bake again for another 15 min for 150C.

    Tips: You can change the filling. Rule of thumb: What can be made as pie can also be made for crumbles, except pumpkin :p.


    Curry Rice ~ カレーライス


    It's a yummy treat, worth to try and it's very easy to make, a no brainer. I make minced pork curry this time because I lazy to cut any meat, that's all.

    Ingredients:
    1 pack Japanese curry pack (i use Vermont honey apple curry - Hot
    300 gr minced pork
    300gr carrot - cut big
    300gr potato - cut big
    2 onions - sliced thick
    2 banana
    1 gala apple
    1 big scoop of honey (I use dark honey)
    500 ml chicken stock
    350 ml water

    How to:
    1. Sautee onion until cooked, then add on minced meat and cook until meat is well done.
    2. Add on carrot, potato, chicken stock and water, bring to boil.
    3. Mesh apple and banana using blender, mix in honey and cut curry block. Add them in.
    4. Cook until the carrot is soft.

    Tips:
    1. it's ok to use apple only, you can use more apple to substitute banana
    2. you can substitute potato with apple (it'll more sweet and less starchy)
    3. And always if you're eating the curry rice with egg, poke the yolk and mix it with the curry sauce, you'll get a totally different taste, and yummy level goes up 1 more notch

    Challange: I saw on some show that they actually add chocolate or coffee. Never try this, guess, I'll leave this to the real restaurant to do LOL...


    Simple Pumpkin Soup


    Pumpkin soup is really easy to make, but it's labour intensive, unless you have a maid. This time, the soup has no seasoning, no salt, no pepper, no sugar, at most it's herbs. Healthy enough?

    Ingredients:
    250 gr pumpkin - cut to pieces
    250 gr butternut squash - cut to pieces
    1 no big onion - diced
    700 ml chicken stock (have 1L ready, to be safe)
    100 ml cream

    How to:
    1. Caramelized onion with olive oil in the pan (I use grapeseed oil now - less fat than EVOO). Caramelized doesn't equal to burnt, always use low fire. I didn't fully caramelize the onion because it'll take ages (about 1 hour or so at least), but just enough until it's browning and the fragrant comes out.
    2. Add in the pumpkins and chicken stock, bring to boil.
    3. When the pumpkin are mushy enough, mesh it with potato mesher (hand blender will come in handy). Then pour the soup to strainer. This is when the labour intensive comes especially if your have a very fine strainer.
    4. Pour back the strained soup into the pan and bring to boil again.
    5. Add in cream.
    6. If the soup is to thick to your liking, add more chicken stock to thin it. Alternatively, add more cream.
    7. If you feel the soup is not tasty enough, then you have no choice but to add on salt, but for me, this is just nice :)

    Serving: Pour the soup into the bowl, add sour cream or thick cream and top it with herbs.

    Tips:
    * Courtesy from Vero: substitute butternut squash with sweet potato and add parmesan cheese
    * If you have maid, use the old style chicken stock (boil water + chicken bones). I'm using the ready-made organic chicken stock with less sodium.


    Meatloaf Baked Rice


    This time it's a simple baked rice, I've made similar baked rice previously, but I modified this one because... there are people who don't eat onions...

    Ingredients:
    2 cups White rice (not cooked yet) -- this should filled about 4cm from your ramekin base
    300 gr minced beef
    200 gr minced pork
    1 bunch cillantro/thai parsley - chopped
    1/2 cup bread crumbs
    2 no eggs
    1/2 no red bell pepper - diced small
    1/2 no orange bell pepper - diced small
    50 gr parmesan regianno - grated
    Condiment: tomato sauce, salt, honey, worcestershire sauce

    How to:
    1. In the mixing bowl, mix minced meat, cilantro, bread crumbs, condiments and eggs until well mixed and the meat turn smooth paste *I found by doing this, after baked the meat is more tasty and juicer... thanks for what I saw on this week's HnA LOL*
    2. After the meat is ready, add on the bell peppers, mixed just until the bell peppers are well spread
    3. Assemble: on the ramekin, put rice as the base, then layer thinly with cheese and tomato sauce. Then, on the top, add on the meat mix and again finish it with the tomato sauce and cheese layer.
    *if you have more rice, you can do this: rice - cheese+tomato sauce - meat - chese+tomato sauce - rice chese+tomato sauce -  meat - chese+tomato sauce. I think this is more fun, but 2 cups is not enough for this :)
    4. Baked at 170C for about 40 minutes *start checking after 35 minutes*

    Enjoy!


    Nasi Tim Ayam


    Thought of sharing this easy recipe. You won't find nasi tim ayam anywhere outside Indo, not even in Singapore. So, you gotta make your own if you want to have one. The only obstacle in making this dish is that you have to have the giant steamer that can hold 10 small bowls because if you notice, that nasi tim ayam is always in the bowl shape, right? But, this problem is solved if your rice cooker can be set to cook mixed rice or have a timer setting :D :D and it's a very easy breezy dish to cook too.

    Ingredients:
    200-300 gr chicken breast, cubed
    1 can straw mushroom (jamur merang), drained and halved
    1 pack shitake mushroom, sliced
    10 cloves garlic, chopped
    a little bit of grated ginger
    Seasoning: salt, pepper
    Condiment: mirin, kecap bango, oyster sauce, Worcestershire

    3 cup of rice
    250 ml chicken stock (I use Swanson, too lazy to make my own chicken stock)
    Water -- add on more if you want softer rice

    How to:
    1. On a wok, heat up oil (I use combination of olive oil and sesame oil), cook garlic until fragrant
    2. Add on chicken, and all condiments, once chicken is half-cooked, add on the mushrooms. Just cook until the shitake slightly soft, there's no need to cook until all well done because all will be done in the rice cooker.
    3. Move the chicken and mushroom to the rice cooker (including all the gravy). Add on the rice, chicken stock and water. Set your rice cooker, and done.

    Side dish:
    5 cloves garlic
    1 bunch Brocolli, cut

    Make a Brocolli stir-fry with a dash of salt

    * No picture here because you cannot serve that giant rice cooker bowl at 1 go, right?*

    Steamed Fish


    Yey for my steamer! Now I can make my steamed fish again and again w/ minimum washing! It's simple, less hazzle, healthy and yummy! O ya, sorry no pics coz it went straight to stomach once the timer was off.

    Ingredients:
    1 Your fave fish (I use frozen fish because they're cheap and boneless, but if you live in US, where fish is cheap, it's either cod, seabass or tilapia, take your pick)
    Topping (you can use it as much as you want, or even omit them, except the ginger):
    Green onion (cut 3cm length)
    Ginger (sliced thinly)
    Shitake mushroom (sliced thinly)
    Sauce:
    Soy Sauce, Mirin, sugar, salt (mixed well)
    *Note: this also can be done with the normal steam pot, but having steamer is totally make it even more effortless

    How to:
    1. In your steamer, place everything with shitake mushroom on the top
    2. Pour in the sauce
    3. Steam for 25 minutes
    4. Done

    See? That's how easy it is and with steamer, you don't have to worry that the fish will be too dry (yes, I had these experiences before that my tilapia sort of dried up)

    Chamomile Bread with Candied Orange


    Ingredients:
    300 gr bread flour
    30 gr sugar
    5 gr yeast
    5 gr bread improver - soft
    130 gr water infused with Chamomile tea*
    60 gr milk
    60 gr candied citrus peel*
    30 gr butter
    3 gr salt

    How to:
    1 day before you make the bread:
    1. Boil 180gr water and infuse it with 2 bags of Chamomile tea for 15 minutes. I use Lipton tea coz it's cheap but gives out strong aroma and flavor. Chill the infused water in the fridge. You need it to be cold to make the bread.
    2. Make the candied citrus peel. to make 60gr, 1 orange and 1 lemon peel should do the job. Do include the white parts to give more bites. Weigh the peel that you manage to get and the sugar you use should be 3/4 of the peel weight and the juice plus water should weigh about 1/4 of the peel weight . On the sauce pan, boil all of them until water all vaporated. Strain them, let it cool in the container. There's no need to put it in the fridge coz you're going to use them tomorrow anyway.

    On the D-day:
    1. On a clean table, pour in all the dry ingredients except salt, make a well (make sure the wall is high enough that the water won't go all over the place, it'll be messy). Pour in all the liquid into the well and work from the inside to blend in. Keep on kneading until the dough doesn't stick on your finger.
    2. Add on butter, keep on kneading. The dough will start to get greasy and sticky, but it'll soon be smooth and not sticky. By this time the dough should be slightly warm. Then add on salt, and keep on kneading. By now you're already kneading the dough for about 15 minutes. If your kitchen is hot (like mine), the dough will be done faster. To tell that the dough is OK for you to add the citrus peel is when you take piece of it and try to tear it, you'll see a membrane form (it'll be not as thin as if you do the dough w/ machine, but this is home-made and the quantity is too small for machine, and I still love my cheap mixer, to break it for making bread is so not worth it).
    3. Add on citrus peel. Knead it to make the peel spread evenly across the dough. You'll feel that the dough become sticky again, but keep on kneading, it'll turn back to its not so sticky stage in no time. Once done, cover the dough w/ cling wrap and let it rest for 15 minutes.
    4. Divide the dough to 60gr each (you should get about 10-11 pieces). Round them into balls and cover them w/ cling wrap again and rest for another 15 minutes.
    5. Place the balls into the baking sheet and prove it for about 1 hour. To make your own prover, what you need is a tuppleware big enough to put in your baking sheet (that's why i always make the chain bread coz my portable oven only can accomodate that 9' square pan). Place a bowl of boiling water next to your baking sheet, close the lid tightly and leave it for 1 hour.
    6. Pre-heat your oven to 200C.
    7. Take out the baking sheet, egg wash the bread with milk (not egg) and sprinkle some of the citrus peel. Bake for 12-15 minutes.

    Tips:
    1. Don't throw away the tea bags! Chil the teabag in the fridge, and use it for eye mask. It's super relaxing and after a quick nap of 30 min, I can see my eyebags not so black hahaha...
    2. This only apply for those who live in hot place like SG. Put your bread in the fridge. Whenever you want to eat it, just take 1 piece and heat it for 10 secs in microwave, you'll get a freshly baked bread for feast :).